Oracle BI EE 11g – Delivering Prompted Dashboard Pages using iBots/Agents – Saved Selections
If you have looked at my blog entry here, i would have shown you how to go about delivering prompted dashboard pages. But the major drawback with that approach was one cannot send out PDF attachments as it involved the use of GO URL and iframes. Lets look at another approach (thanks to an excellent tip from Mike Durran, Oracle BI Delivers Product Manager) wherein one can deliver prompted dashboard pages even as PDF attachments. Lets start with the same example as before. Open up the Brand Analysis Dashboard page and apply some prompt values on the page.

Now, our aim is to send this page as is (with the applied prompt values) to end users. In order to so this, create a shared selection for this page


Make the saved selection as default for this page (if you want to deliver this as multiple users then you need to make the selection as default for all the users). Once this done, just deliver the dashboard page. This will automatically send the page after applying the selection


An elegant solution if you want to send a dashboard page with applied prompt values.
Oracle BI EE 11g – Proxy User Functionality
One of the very good features of BI EE is its ability to enable proxy functionality for all/some users. For example, as an Administrator user, one can proxy as another user and can find out what kind of dashboard other users have. One other good example is (given in the documentation) a manager user allowing one of his direct reportees to create reports for him. Though the setup for this functionality is straight forward, i thought i would blog about it since the functionality is commonly desired.(I believe Borkur had blogged about it before. Not sure where it is now. If anyone has the link, just leave a comment with the link and i would update the link here.) We shall be using 2 terms here. They are ProxyUser and TargetUser. You can understand what these 2 users mean from the below diagram

Basically ProxyUser is the user who would be proxying as other users. I.e User A can proxy as user B, C and D(targetUsers)
Enabling this functionality is a four step process.
1. Let BI Server and Presentation Server know about the list of target users.
2. Let BI Server and Presentation Server know about the list of proxy users.
3. Let BI Server and Presentation Server know about the relation between the target and proxy users (who will proxy in as whom)
4. Create an InitBlock and a system session variable called PROXY to allow the proxy user to authorize.
The first 3 steps are achieved by adding a set of tags to the instanceconfig.xml. Lets take a simple example. There are 2 users Administrator and paint. Our aim is to set up a proxy funtionality for the Administrator user so that he can proxy in as the paint user. In order to do that lets start with creating a simple table with the below structure.
1 |
CREATE TABLE PROXYTABLE |
2 |
( |
3 |
PROXYUSER VARCHAR2(100), |
4 |
TARGETUSER VARCHAR2(100), |
5 |
PROXYLEVEL VARCHAR2(20) |
6 |
) |
PROXYUSER – Stores the list of PROXYUSERS needed within BI EE. In our case, this column should have the Administrator user as one of the values.
TARGETUSER – Stores the list of TARGETUSERS needed within BI EE. In our case, this column should have the paint user as one of the values.
PROXYLEVEL – This can take 2 values — full or restricted. If full access is provided, then the proxyuser would have edit/read privileges of the target user (provided the proxyuser himself has those privileges). If restricted access is provided, then the proxyuser would only have read privileges (provided the proxy user himself has those privileges).
Now, lets insert the users as desired for our example into the table
1 |
INSERT INTO PROXYTABLE values('Administrator','paint','restricted'); |
Once this is done, create a seperate connection pool connecting to the database containing the above table.

Now, lets start with the first 3 steps mentioned above i.e to let the BI Server and Presentation Server know about the list of target, proxy users and their corresponding relationships. In order to do this, we need to first add a set of tags to the instanceconfig.xml that would let the presentation server know about an XML template(which would contain the queries to get the list of target, proxy users). So, add the tags given below to your instanceconfig.xml (between the ServerInstance tags)
1 |
<LogonParam> |
2 |
<TemplateMessageName>LogonParamSQLTemplate</TemplateMessageName> |
3 |
<MaxValues>100</MaxValues> |
4 |
</LogonParam> |

In the above XML, TemplateMessageName tag value(LogonParamSQLTemplate) would be the Template name which we would be creating.
Go to {OracleBIDate}\web\msgdb\customMessages (if you do not have this folder, create one) and create the below XML file in this folder (you can give any name to the XML file)
01 |
<?xml version="1.0" encoding="utf-8" ?> |
02 |
<WebMessageTables xmlns:sawm="com.siebel.analytics.web.messageSystem"> |
03 |
<WebMessageTable system="SecurityTemplates" table="Messages"> |
04 |
<WebMessage name="LogonParamSQLTemplate"> |
05 |
<XML> |
06 |
<logonParam name="RUNAS"> |
07 |
<getValues>EXECUTE PHYSICAL CONNECTION POOL Proxy.Proxy |
08 |
select TARGETUSER from PROXYTABLE where PROXYUSER='@{USERID}'</getValues> |
09 |
<verifyValue> EXECUTE PHYSICAL CONNECTION POOL Proxy.Proxy |
10 |
select TARGETUSER from PROXYTABLE where PROXYUSER='@{USERID}' and TARGETUSER='@{VALUE}'</verifyValue> |
11 |
<getDelegateUsers>EXECUTE PHYSICAL CONNECTION POOL Proxy.Proxy |
12 |
select PROXYUSER, PROXYLEVEL from PROXYTABLE where TARGETUSER='@{USERID}' |
13 |
</getDelegateUsers> |
14 |
</logonParam> |
15 |
</XML> |
16 |
</WebMessage> |
17 |
</WebMessageTable> |
18 |
</WebMessageTables> |
Once this is done, restart the presentation server. Now, the next step is to initialize a system session variable PROXY from an init block. This will help in authenticating the proxy user as the target user.


In the InitBlock use this SQL.
1 |
SELECT TARGETUSER FROM PROXYTABLE WHERE 'VALUEOF(NQ_SESSION.RUNAS)' = TARGETUSER AND':USER' = PROXYUSER |
Do not worry about RUNAS session variable. This RUNAS session variable would be populated when you click on the target user. And based on what you have clicked, the PROXY user value would be populated. Now, if you log on as Administrator and click on Settings -> Act as, you would get the paint user.


Now, the Administrator user should be able to proxy as the Paint user

If needed, you can populate another session variable PROXYLEVEL to vary the access levels of the proxying user. But this should get you started.
Oracle BI EE 11g – Delivering Prompted Dashboard Pages using iBots – Bookmark links and HTML
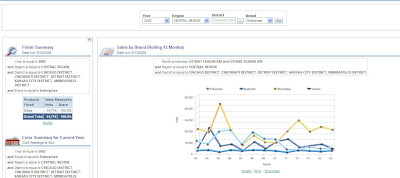
One very good feature that BI EE does not have currently is the ability to send prompted dashboards to users via iBots. Currently, iBots can only send filtered reports but not dashboards. Lets look at an approach today to send prompted dashboards to end users. Use this approach only if you have no other option. Using the approach one can send the dashboards only in HTML format (PDF would not work). Let us start with the Brand Analysis Dashboard Page that we have in the Paint Dashboard. This page contains 4 prompts and a number of reports. Lets choose some values in all these prompts and run the reports like the one shown below
Our aim is to send this page(with the prompt values that we have chosen) via delivers. In order to achieve this lets start with create a Bookmark link to the page. If you are not sure what Bookmark link does, check my previous blog entry here. This bookmark link would give us a dashboard page with the same prompt values that we applied above. Now save this link. Then go to answers and create a simple report. Include a dummy column with the below formula
1 |
CASE WHEN 1=0 THEN Markets.Region ELSE 'Dummy' END |

This is to ensure that the report does not throw out any error. Now, go to the narrative view of this report and enter the below iframe html code.
[/sourcecode]

In the above iframe, replace the src= attribute with the bookmark link that you saved in the previous step. Also, ensure that you are adding nquser and nqpassword parameters as shown above. Now, in the compound layout of this report just have this narrative view. Save this report. Now go to delivers and schedule an ibot to send this report to end users. Ensure that you are sending the content only as HTML.

Now, your end users would be receiving the prompted dashboards via delivers.

Not the best solution, but can be used in certain cases where the requirement is an absolute must. One can add more customizations to this by choosing a single bookmark page from multiple pages.
